| Overview |

"First contact with the Skaarj came during the recovery of the prison transporter Vortex Rikers on Na Pali. Within a year the Skaarj had pushed humanity back to the brink of destruction. This scenario replicates the final battle for Earth, and the stunning victory by humans in the face of almost certain defeat. A Skaarj Mothership orbited the Earth, and rained death upon the planet in preparation for the final landing. In a daring suicide mission, the humans attacked the Skaarj Mothership in small one man fighters, hoping to exploit a flaw in the Mothership defenses their analysis had revealed."
– Map description
Map description[]
This map offers a twist not only to the Assault gametype, but to the entire Unreal universe. For the first objectives the 2 teams use space fighters to attack/defend. After this large-scale dogfight the teams respawn inside the mothership where the attackers must attempt to make their way to the ship's core and destabilize it.
There are several named areas in the map:
- In Space: Self-explanatory, really. This is the first area players from both teams interact with each other and the ship's turrets. And by "interact" we mean "kill each other and the turrets".
- Space Craft Bay: The first spawning point for defenders, where they can either choose to control a turret or a ship.
- Defender's Landing Bay: The spawn point for defenders in the space battle phase. They can also land here in order to pick up a new ship and continue the battle.
- Lower Section Generator Shaft: The area where the first objective is located. Ships must destroy the generator shaft located here.
- Lower Cross Path: The lower section's cross paths where ships can maneuver out of the ship before the first objective is completed.
- Energy Generator #1/#2: The location of the second objective, at the east and west wings. These generators must be destroyed so the landing bay generators are powered down.
- Left/Right Shaft: The wings near the above energy generators where the attackers must go through to destroy the generators.
- Main Middle Shaft: The lower part of the ship where attackers must enter in order to destroy the first objective.
- Inner Top Shaft: The shaft that serves as a hub between the generator shaft and energy generator crossing paths.
- Landing Bay: Located at the south of the ship. The attacking team must land in these places in order to achieve the third objective, landing in the Mothership itself.
- Attackers Landing Bay: The first spawn point on foot for the attacking team. A two-level area with an elevator going between levels.
- Defender's Bypass Spawn: The spawn point for defenders, a C-shaped room whose extremes end in the Energy Bypass room.
- Energy Bypass Room: The area where the first objective on foot, the two Energy Bypasses, are located.
- Left/Right Hallway: Two lower level hallways from the Attackers Landing Bay's lower level all the way to the Energy Bypass Room.
- Top Energy Bypass Entrance: The upper level entrance from the Attackers Landing Bay.
- Elevator Passage: The area between the Energy Bypass room and the Elevator shaft.
- Elevator Shaft: An elevator going from the upper level of the Sentinels room to the lower level, ending directly at the location of the last sentinel.
- Cargo Upper Bridge Left: A bridge ending directly in the location of a sentinel in the Sentinels room.
- Cargo Upper Bridge Right: A bridge ending at the same aisle as the above.
- Cargo Hull Hallway: Once the Floor Sentinel of the lower level is the last Sentinel to be destroyed, attackers will spawn here.
- Cargo Hull: An area located betwwn the Sentinels room and the Core Exterior, becomes the attacking team's spawn point once the sentinels are taken down and the Core Exterior has been breached.
- Core Exterior: The outer part of the core. Contains two Link Turrets, one per side, controlled at the Gravity Engine Hallway Left/Right.
- Core Bridge Passage Left/Right: A small, multi-level room connected with the Core Exterior and The Core in the lower levels, and the Gravity Engine Room in the upper level. Attackers must pass through here in order to reach The Core.
- Gravity Engine Room #1/#2: The last spawnpoint for defenders, located at the upper level. Leads to the Gravity Engine Hallway Left/Right where the last Link Turrets can be controlled.
- Gravity Engine Hallway Left/Right: A hallway for defenders, near the last defender spawnpoint, grants access to the Link Turrets located near the core by way of turret monitors.
- The Core: The last area of the level, a two-entrance circular room where the two last objectives (the computers controlling the core, and the core itself) are located.
Objectives[]
- Destroy Lower Shield Generator: The first 3 objectives have the players spawned in Space Fighters (Human Space Fighters for the attackers and Skaarj Space Fighters for the defending team). The attackers must destroy the Lower Shield Core which is located in the lower section of the ship. One way to get to the generator is by entering the bottom of the ship. There's another shorter route via 2 narrow tunnels, of which the entrances are indicated by gray tongue-like objects (on the outside of the lower half of the ship). This route is shorter, but also has more defenses, including Energy Turrets.
The defending team has 2x4 (2 for each entrance of the tunnels) turrets to use to protect the upper hallways. These turrets are equipped with basic AI when unmanned. There are more Plasma and Link Turrets spread over various crucial points of the ship, all of which can fire at the attackers throughout the space battle. The entry on the bottom of the ship is largely unprotected though. - Destroy Upper Shield Generator: Now the attacking team must destroy the 2 Upper Field Generators, which are located in a hallway in the upper half of the ship. The entrances to this hallway are indicated by large gray shapes sticking out of the ship. 2 other entrances can be found on the roof near the other entrances. The narrow tunnels there lead to the hallway with the generators inside. This route bypasses one of the generators, so the attackers will only be able to fire at the other generator. A final route is through the top of the ship. Although this route takes longer and requires some handy maneuvers, it is also largely unprotected by turrets.
Most of the new routes are protected by turrets. The hallway (with the 2 Generators inside) is defended by 4 Energy Turrets (2 in the middle and 1 at each entrance). The 2nd set of entrances (through the narrow tunnels) is also protected by 2 Link Turrets (each). The top route is largely unprotected. Despite the heavier defenses the AI will almost always choose for the 1st set of entrances. - Proceed to Landing Bay: After all the generators have been destroyed the attackers must enter the ship. The entrance to the docking bay is on the same level as the entrances to the hallway with the Upper Shield Generators. Since the entrance to the Landing Bay is narrow, the Space Fighter has to fly on its side to be able to fit through.
There is only 1 entrance to the loading bay, which is an advantage for the defending team. Their disadvantage is that the defenders' ships spawn on the opposite side of the ship. There are also 3 turrets (2 Energy Turrets and 1 Link Turret) near the entrance of the Landing Bay that can be used in their defense. - Destroy Energy Bypass: The attackers must now destroy 2 Energy Bypass mechanisms. The doors on the ground-level lead to a corridor leading to the mechanisms. There's also an elevator in the back of the spawnroom which goes up to a path leading to the objective. The higher ground of this route gives a better view on the Energy Bypasses, but it's also more exposed to enemy fire.
The defending teams starts with only a Flak Cannon and Rocket Launcher in their weapon loadout, which is perfect for taking down the attackers. Additional flak ammo and a health pack can be found on the 1st floor opposite of the defender's spawnroom. - Destroy Sentinels: For the next objective the attackers must destroy 3 weakened Floor Sentinels. These are all located on the same path. After destroying the Energy Bypasses, the path splits. The left path leads to the 1st Sentinel, the right path is a shortcut to the 2nd Sentinel and the lift in the middle leads to the final Sentinel. These Sentinels, unlike the ones often found near spawnpoints, only have 500 health. After all 3 have been destroyed the path to the core is opened.
The Sentinels are strong, but vulnerable turrets. They can provide some sort of back-up for the defending team, but they're easily destroyed. The defender can only stall the attackers by defeating them in 1on1 combat. The defenders can heal the turrets with the link gun, but the healing rate is greatly reduced meaning it they cant be healed nearly as fast as they can be destroyed unless the whole team is healing them. - Use Panel to unlock Core Hatch: After the path has been cleared and a slow-moving door has been opened the attackers must cross a bridge which is guarded by a Link Turret. This turret can easily weaken an opponent, but swift movement and the coverage of the crates should keep the attackers safe. After having crossed the bridge the attackers must move through a hall and corridor before they reach the Core's chamber. The Panels for the hatches are located right next to the Core, in the middle of this room.
The bridge forms the first point of defense. The Link Turret alone will likely not be enough to stall the attacking team. Combined with additional backup this bridge can be used to stall the attackers. the rest of the path to the core is a bit harder to defend. The corridors leading to the core is the defending team's 2nd option, but a number of crates in the hallway make it harder to defend. - Destroy the Conductor: The Core is now exposed and ready to be destabilized. Destabilizing the core isn't the hardest part. Avoiding enemy fire is. A few fully-loaded alt-shots of the Bio Rifle is enough to complete the objective and finish the match.
Again, the only way to defend this objective is by defeating the attackers in 1on1 combat. The attackers will likely be distracted by trying to deal some damage to the Core, which should give the defenders an advantage in combat. There are no pickups in the area to help the defenders.
Weapons and pickups[]
Weapons[]
| Weapon | Count | Location |
|---|---|---|
4 |
Ammo: 1x Core Exterior, near some crates, southeast wing. 1x Core Exterior, near some crates, northeast wing. 1x Core Bridge Passage Left. 1x Core Bridge Passage Right. | |
6 |
Ammo: 2x Core Exterior, near north Link Turret. 2x Core Exterior, near south Link Turret. 2x Cargo hull hallway, near the first sentinel. | |
7 |
Ammo: 3x Cargo hull hallway, near the first sentinel. 2x Cargo hull hallway, near the first sentinel. 2x Cargo hull, after the forcefield-protected entrances. | |
6 |
Ammo: 6x Energy Bypass room, at the upper level ledges, three per side. | |
6 |
Ammo: 2x Cargo hull, after the forcefield-protected entrances. 1x Core Bridge Passage Left. 1x Core Bridge Passage Right. 1x Cargo hull hallway, at the last turn before lower floor. 2x Cargo hull hallway, near the second sentinel. | |
2 |
Ammo: 1x Core Bridge Passage Left. 1x Core Bridge Passage Right. | |
W : 13 |
Weapon: See below. |
Weapon Lockers[]
| Items | Count | Location |
|---|---|---|
   |
1 | 1x Cargo Hull Hallway, defenders' spawnpoint. |
  |
3 | 1x Attackers' Landing Bay, upper bridge. 1x Attackers' Landing Bay, west spawnpoints. 1x Attackers' Landing Bay, east spawnpoints. |
 |
1 | 1x Cargo Hull, near last sentinel. |
|
1 | 1x Cargo Hull Hallway, defenders' spawnpoint. |
  |
2 | 2x Core Exterior, attackers' spawnpoint. |
|
2 | 1x Gravity engine room #1. 1x Gravity engine room #2. |
|
1 | 1x Cargo hull, after the forcefield-protected entrances. |
|
2 | 2x Defender's Bypass Spawn. |
Pickups[]
| Pickup | Count | Location |
|---|---|---|
11 |
1x Cargo hull hallway, last turn before second sentinel. 1x Cargo hull, near Core Entrance, north arm. 1x Cargo hull, near Core Entrance, south arm. 1x Core Bridge Passage Left. 1x Core Bridge Passage Right. 1x Energy Bypass room, in a ledge. 1x Left hallway. 1x Right hallway. 2x Core Entrance. 1x Elevator Hallway. | |
1 |
1x Core Entrance. | |
1 |
1x Attacker's Landing Bay, near elevator to upper bridge. |
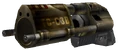
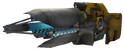
Vehicles[]
| Vehicle | Count | Location |
|---|---|---|
7 |
1x Core Exterior, north area. 1x Core Exterior, south area. 2x In Space, above Energy Generator #1. 1x In Space, guarding the Landing Bay. 2x In Space, above Energy Generator #2. | |
14 |
1x In Space, guarding the east wing. 1x In Space, guarding the west wing. 1x Guarding west entrance to Lower cross path. 4x Lower cross path, guarding the Lower Generator Shaft. 2x Inner top shaft, guarding the Energy Generators #1 and #2. 2x In Space, guarding the Landing Bay. 1x Guarding south entrance to Lower cross path. 1x Guarding east entrance to Lower cross path. 1x Guarding north entrance to Lower cross path. | |
7 |
1x Cargo Hull Hallway, northwest turn (key objective). 1x Cargo Hull, lower level (key objective). 1x Cargo Hull Hallway, last turn (key objective). 2x Core Entrance, protecting the attackers. 2x Attacker's Landing Bay, protecting the attackers. | |
6 |
2x Attacker's Landing Bay, protecting the upper bridge. 1x Gravity engine room #1, protecting the spawnpoints. 1x Gravity engine room #2, protecting the spawnpoints. 2x Energy Bypass room, protecting the attackers. |


Walkthrough[]
"First contact with the Skaarj came during the recovery of the prison transporter Vortex Rikers on Na Pali. Within a year the Skaarj had pushed humanity back to the brink of destruction. This scenario replicates the final battle for Earth, and the stunning victory by humans in the face of almost certain defeat. A Skaarj Mothership orbited the Earth, and rained death upon the planet in preparation for the final landing. In a daring suicide mission, the humans attacked the Skaarj Mothership in small one man fighters, hoping to exploit a flaw in the Mothership defenses their analysis had revealed."
– Mission description
Winning this match grants you the Assault Championship.
Tips and tricks[]
Offense[]
- While attacking, during the space battle a lot of the turrets and Space Fighters can be avoided by taking some detours. Doing so will cost time, but will increase the chances of survival.
- Once inside, all of the objectives are a combination of fighting off defenders and destroying an object. Choosing to aim for the objective may help reach the objective, but it may also result in a quicker death. Focusing solely on the defender may increase one's lifespan, but it won't help reach the objective. A good coordination between teammates and division in priorities is the key to successful battles in these scenarios.
- In the first stage of the assault with the space fighters, it helps to have a high mouse sensitivity in order to make sharper turns to avoid enemy missile attacks and maneuver easily in the inside of the mothership. A mouse sensitivity value of about 7.0 is good enough to make your space fighter fly rings around the upper shield generators.
Defense[]
- The Energy Turrets can operate themselves, so the defending team should all man the fighters. They should chase down the attackers from the moment they spawn. Also, when using the Skaarj Space Fighters, the defenders can at any time return to the space craft bay to replace their fighters should they take heavy damage on battle. If all else fails: Kamikaze by flying through an opponent.
- The rest of the objectives requires the attackers to fire at something. Defenders should exploit this distraction (as well as their advantage in weaponry) to stall the attackers. Narrow hallways without much obstructions make good choke-points.
- As with the attackers, having a high mouse sensitivity helps your space fighter to make it more maneuverable.
Trivia[]
- According to the official Unreal timeline, the whole event took place between 2215 and 2216.
- The map was part of the E3 demo of the game.
- The map was ranked 9th. place in BeyondUnreal's Top-10 Most Innovative UT2004 Level Designs:[1]
"Another official UT2004 map that breaks new ground for the series with its space battle. This drop dead gorgeous map is the artistic opposite of Joust, and it serves well as a proof-of-concept and fits perfectly in the Unreal Tournament heritage of action in blazingly new arenas. You won't mistake the combat for something you'd see in the Independence War series, but UT2004 series innovation is what this list is all about, right?"
– BU's Top-10 Most Innovative UT2004 Maps
Localization errors and inconsistencies[]
- Spanish:
- Sentinel objectives: The nominal form ("destruir"/"defender") is used instead of the imperatives ("destruye"/"defiende")
- The hatch panels are left untranslated. However this seems to be an error of all localizations, which instead means said objective was added to the tail end of the map's development cycle.
- Same deal as most AS maps, the title not only was left untranslated in this case, but also shortened to just "Mothership".
- Description: Skaarj was left as all lower-case.
- Docking bay landing objective: For the Defenders, the attacking team must not "disembark" ("desembarcar"). This is at odds with the other instances that demand players not to "land" ("aterrizar").
- Subtitles:
- "Once completed head upwards into the main body of the Skaarj mother ship." is wrongly translated (possible copy-paste error?) as "Los escudos de fuerza se desactivan una vez que se han destruido los tres centinelas." ("The destruction of the sentinels is the only way to proceed forward."), the message that displays further in the mission when you reached the three Sentry Turrets.
- "Two energy bypass mechanisms will need to be destroyed to proceed to the cargo hull." is also wrongly translated as "Destruye los dos generadores finales para desactivar los escudos de la bodega de carga." The error is that "generadores finales" ("final generators") is used instead of "desvíos de energía" ("energy bypass").
- In a subversion, the english version wrongly says "Past the bridge, the core awaits.", before the sentinels objective is completed, when said bridge is located after them. This localization gets this right, "Llega hasta la bodega de carga." ("Proceed to the cargo hull").
- Zone and Volume names:
- "Gravity engine hallway right" is wrongly translated as "Derecha de corredor de generador de gravedad". The proper localization line would be "Pasillo derecho del generador de gravedad".
- "Defender's bypass spawn" is wrongly translated as "Desvío de generador de defensores". The proper translation would be "Sala de aparición de defensores del desvío".
- "Cargo Hull" is inconsistent with the subtitles: in order to keep consistency it should've been named "Bodega de carga" rather than "Cubierta de carga".
- "Cargo upper bridge left/right" is wrongly translated as "Izquierda/Derecha de puente superior de carga". The proper translation would be "Puente superior izquierdo/derecho de carga".
Preview notes[]
"UT2004's assault mode will feature a minimum of six different scenarios when the game is released, and the one that we got to see at the beginning of our demonstration was quite unlike anything we've ever seen in an Unreal game before. Playing as a human, the mission was to infiltrate a scar [sic] space station by first making it past the defenses into the core in a small craft and then getting out on foot once safely inside. When you're in control of a vehicle in UT2004, you'll have the option of playing in either first- or third-person mode--for the purposes of the demo, the sequence was shown in third-person, which served to show off some of the subtle animations of the ship itself as its speed changed. When playing as the scar [sic] and defending the station on this level, you'll have the option of manning gun turrets on both the exterior and interior, patroling areas of the station on foot, or even heading down to hangar and grabbing yourself a scar [sic] attack craft to indulge in a bit of dogfighting."
– Gamespot[2]
"One of the new gameplay modes is Assault, which has one team defending a base against another invading team, and was featured in the first Unreal Tournament, but not UT2k3. It’s been given quite an overhaul here, and the changes are all for the better. One mission we were shown had a human team invading a Skaarj space station. This started outside the station, with the team coming in on space cruisers, and the defending team attacked using external turrets. Once inside, the attackers have to get to the core and blow the place up, and the environments all felt appropriately alien. Another one we were told about (but not shown) involved an assault on a robot academy, where scores of enemy bots were being cranked out."
– ShackNews[3]
"UT2004 also includes controllable turrets. The AI is capable of taking care of them, but most can also be commandeered by players. This is important in some levels, simply because of the sheer amount of damage being dealt by both sides. One particular level takes place completely in outer space, with the defending team starting on a space station while attackers have to disable their shields and eventually land on the ship. Once inside, the attackers must destroy a power core, while the defenders have lots of turrets and can even go airborne for some dogfighting. This was a truly impressive level, even if the bots couldn't fly the ships on the defending side yet. It's easy to visualize the mass-mayhem this could cause with two sides of sixteen players each."
– Gamespy[4]
"We then played a few sessions of AS-Mothership, a map that took place in and around a gigantic skaarj mothership. The map itself starts the attackers out in space vehicles (small fighter ships) that are tasked with disabling shield generators so that they can eventually dock within the space station, go in on foot and disable security systems (including an optional objective to knock out the ship's gravity generators, which turns the level into a low-grav map), and eventually destroy the ship's core. The defenders in this map were able to man turrets on the outside of the ship to shoot down incoming fighters, and they could also run to the hangar and pilot their own fighters outside the ship to engage in dogfights. The assault maps we played provided quite a different experience from standard deathmatch and will likely appeal to players who enjoy working toward specific objectives in games like Counter-Strike and Battlefield 1942 without having to deal with punishing realism or difficult flight controls."
– Gamespot[5]
"The one Assault map we were shown at E3 took place in space. Yes, in space, with one team flying one man fighters to try and dock at a space station to take it over while the defending team fires turrets and launches its own fighters to stop them. Think UT mixed with the Death Star attack and you will get the idea."
– HomeLan Fed[6]
External links and references[]
- ↑ hal (August 21, 2006). "Top 10: Most Innovative UT2004 Level Designs". BeyondUnreal. Retrieved May 7, 2019.
- ↑ Calvert, Justin (May 14, 2003). "Unreal Tournament 2004 Impressions". Gamespot. Archived from the original on January 16, 2005. Retrieved May 10, 2019.
- ↑ Bergman, Jason (May 16, 2002). "E3 Day Two Report". Shacknews. Archived from the original on February 29, 2004. Retrieved May 10, 2019.
- ↑ Rice, Kevin (August 7, 2003). "Unreal Tournament 2004 (PC) Preview". Gamespy. Archived from the original on December 4, 2003. Retrieved May 7, 2019.
- ↑ Brad Shoemaker, Andrew Park (September 11, 2003). "Unreal Tournament 2004 Hand-On Impressions". GameSpot. Archived from the original on February 19, 2004. Retrieved May 27, 2019.
- ↑ Callaham, John (May 16, 2003). "Unreal Tournament 2004 Impressions". HomeLan Fed. Archived from the original on February 7, 2005. Retrieved July 11, 2020.
See also[]
| Assault maps for Unreal Tournament 2004 |
|---|
| Mega Pack maps: |