| Map stub |
|---|
| This article is a stub. You can help the Unreal Wiki by expanding it. What needs to be done: Add the missing info. |
If you're looking for other versions of the map, you might want to check Recurring maps#HyperBlast.
If you're looking for other versions of the map, you might want to check Recurring maps#Phobos Moon.
Map description[]
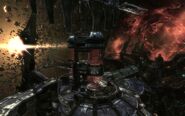
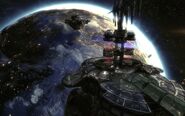
Technically intended as a combination of DM-Phobos and DM-HyperBlast, Deimos is a mixed-gravity arena that takes place on an orbiting station above the planet Taryd.
Deimos resembles DM-Phobos, on the surface, a roughly conical space station with a central pit and surrounding hallways, as well as lowered platforms on the left and right, but the similarity is largely superficial. It contains a few elements of DM-HyperBlast, among them the horse-shoe shaped tunnel arcing outward from the main body of the map, and the general feel of the upper low gravity areas (with the middle section bumped up and two lower areas on either side). The station is in high orbit above Taryd, and the planet is visible when looking in the direction of the Turret. The Jumpgate looms on the other side, sporting a dark black and red palette. The sun to the right (facing the Turret) casts a strong highlight on passing asteroids.
The gameplay takes place both inside and outside the station. The gravity is substantially reduced while outside, similar to the Unreal Tournament 2004 versions of Phobos and HyperBlast. The gravity zones are differentiated by non-solid force-fields that are red from the outside and green from the inside.
A small shuttle allows teleport access to a distant platform which contains an Energy Turret normally found in Vehicle CTF or Warfare. The Turret is fairly powerful, and has a good view of many combat areas on the side of the station it faces. Operators can be sniped out of the Turret with the Sniper Rifle, located on the map's highest point, accessible via two zero-gravity tubes that allow players to swim up and down them. The Turret is also in range of almost every other weapon on the map, but can be devastating nonetheless.
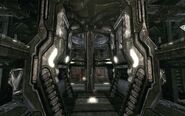
By and large it uses the tech texture sets, and is similar to maps like DM-CarbonFire or the bases in WAR-Torlan, for example. The Necris influence is present, however, and a few Necris tentacles can be found here and there, snaking along its hull.
Weapons and pickups[]
Weapons[]
| Weapon | Count | Location |
|---|
Pickups[]
| Pickup | Count | Location |
|---|
(*) Rows marked in red are required for the "Like the back of my hand" achievement.
Vehicles[]
| Vehicle | Count | Location |
|---|---|---|
1 |
- |
Walkthrough[]
Act IV: Calculated Losses[]
The alliances that Izanagi made with Axon and Liandri caused the Phayder to act out of desperation and launch a full-scale war, which has drawn the attention of the NEG. When Reaper reaches this map in the Campaign, he is chasing Akasha after her over-ambitious Necris invasion force was pushed back by the intercession of the NEG military forces.
While the Izanagi Corporation is happy to let the Necris go and enjoy the new territory they won from the Axon and Liandri during the conflict, Reaper rallies his team into a revenge strike against the Necris and Akasha. He fights the Necris off of the Deimos station and hijacks a shuttle which he takes through the nearby Jumpgate and into Phayder controlled space; a decision which causes the Izanagi to disavow any association with the Ronin, and a decision which has tragic consequences for the wayward squad down the road. As usual, a dialog opens the mission:
- Reaper: "Learn the layout quickly. Let's use the terrain to our advantage."
- Othello: "This place is crazy! Low-grav, slow zones..."
- Jester: "A slow zone is the only chance you have of matching my kill count!"
And not too long, after Reaper dies for the first time:
- Othello: "So, if, we're on a space station. Might want to watch that first step..."
- Jester: "Your body will come in like a meteor down on Taryd."
When Reaper dies the third time, the following dialog will ensue:
- Reaper: "We need someone on that turret ASAP, look for a teleporter."
- Jester: "Yeah, if only we had someone good at shooting people from really far away..."
- Bishop: "I go to glory!"
So Bishop goes for the Energy Turret. The turret itself is vulnerable from attackers entering through the portal, so you'll want to follow Bishop. The first mean trick you can do, obviously, is to use the turret yourself, which you should do after Bishop is ejected. The second trick is to stand on the inside of the portal with the Impact Hammer - an old trick. Anyone who enters is instantly hole-punched. This provides excellent protection for Bishop while he mans the turret.[1]
Tips and tricks[]
- The longer version of the zero-gravity passages required to access the Redeemer, Jumpboots and Health Keg is one that drops down along the back (considering the Turret side the front) of the arena and ends up facing the Turret.
- The low-gravity outside means that you can easily be knocked off the station and plummet to your death if you get shot while in the air or near a ledge by a weapon with sufficient knock-back, like a Shock Rifle or Rocket Launcher. The slower, "floatier" movement makes hitscan weaponry, like the Shock Rifle, Sniper Rifle and Stinger Minigun much more potent outside, but allows for some creative trick-jumps, like a double-jump wall-dodge from the Body Armor tunnel to the UDamage above. Jump Boots can also cover serious distance in low-gravity areas.
- Some areas feature a darker green transparent surface, which is most prominently featured near the Shield Belt and Rocket Launcher spawn area. These surfaces are solid to players, but non-solid to weapon fire.
- Another instance of the above surface appears between the Redeemer spawn platform and the Flak Cannon spawn above, allowing for attempts to deny someone access to the Redeemer, or blind hail Mary shots up into the Flak room for some lucky kills with the super weapon.
Trivia[]
- Deimos is the name of one of Mars' two satellites; the other being, of course, Phobos.
Gallery[]
External links and references[]
See also[]
| Deathmatch maps for Unreal Tournament 3 |
|---|
| Bonus Pack 1 maps: |
| Xbox 360 originals: |
| Titan Pack maps: |


