| Map stub |
|---|
| This article is a stub. You can help the Unreal Wiki by expanding it. What needs to be done: Add the PS2 info |

Map description[]
An egyptian-themed symmetrical map. The following named zones can be recognized:
- Hall of Pillars: An underground area filled with columns, holding the eponymous control point.
- Passages: Two opposite, unconnected zones of the map which connect the Hall of Pillars with the outside. For description reasons, we're naming these passages North Passage and South Passage. Each passage ends in two small chambers which we're naming Northwest Chamber, Southwest Chamber, Northeast Chamber and Southeast Chamber.
- Outside: The outside area of the map, divided (for description reasons) in Outside Upper Level and Outside Lower Level. The top level is composed of a bridge which ends at four windows, two per side, overlooking the Blue/Red Ankh zones, as well as four passages, also two per side.
- Blue Ankh: Located at the west of the map, houses the eponymous point.
- Red Ankh: Located at the east of the map, houses the eponymous point.
Domination points[]
- Hall Of Pillars: Located at the Hall of Pillars zone, atop of a small tower.
- Red Ankh: Located at the Red Ankh area, sits atop a platform above some deadly waters.
- Blue Ankh: Located at the Blue Ankh area, sits atop a platform above some deadly waters.
Weapons and pickups[]
Weapons[]
| Weapon | Count | Location |
|---|---|---|
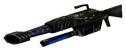
W : 2 A : 5 |
Weapon: 1x Outside, southwest passage, near exit from Southwest chamber. 1x Outside, upper level, east side. Ammo: 2x Near the Outside Southwest passage weapon. 2x Near the Outside upper east weapon. 1x Red Ankh area, near entrance. | |
W : 3 A : 5 |
Weapon: 1x Outside, upper level, west side. 1x Outside, upper level, northeast balcony. 1x Hall of Pillars, northwest area, among the pillars. Ammo: 2x Near the Outside upper west weapon. 1x Hall of Pillars, west side, among the pillars. 1x Near the Outside Northeast balcony weapon. 1x Blue Ankh area, near the entrance. | |
W : 4 A : 7 |
Weapon: 1x Outside, lower level, northwest passage, exit from Northwest chamber. 1x Hall of Pillars, southeast corner among the pillars. 1x Outside, upper level, southwest balcony. 1x Outside, lower level, southeast passage, exit from Southeast chamber. Ammo: 1x Hall of Pillars, east side, among the pillars. 2x Near the Outside Northwest weapon. 1x Near the Outside Southwest Balcony weapon. 2x Near the Outside Southeast weapon. 1x Red Ankh area, near the entrance. | |
W : 6 A : 9 |
Weapon: 1x Outside, main south entrance. 1x Outside, upper level, southeast balcony. 1x Outside, upper level, northwest balcony. 1x Outside, northeast passage, near exit from the Northeast chamber. 1x Hall of Pillars, northeast area, among the pillars. 1x Hall of Pillars, southwest area, among the pillars. Ammo: 1x Hall of Pillars, east side. 2x Outside, main south entrance, near the column. 1x Hall of Pillars, west side. 1x Near the Outside Southeast balcony weapon. 1x Near the Outside Northwest balcony. 2x Near the Outside Northeast passage weapon. 1x Blue Ankh, near entrance. |


Pickups[]
| Pickup | Count | Location |
|---|---|---|
| Health | ||
34 |
3x Blue Ankh area, north room. 3x Blue Ankh area, south room. 3x Red Ankh area, north room. 3x Red Ankh area, south room. 6x North Passage, 3 at each subpassage. 6x South Passage, 3 at each subpassage. 10x Hall of Pillars, 5 at each side among the pillars. | |
12 |
1x Outside, upper level, passage to the Blue Ankh south room. 1x Outside, upper level, passage to the Blue Ankh north room. 1x Outside, upper level, passage to the Red Ankh south room. 1x Outside, upper level, passage to the Red Ankh north room. 1x North Passage, northwest chamber. 1x North Passage, northeast chamber. 1x South Passage, southwest chamber. 1x South Passage, southeast chamber. 2x North Passage, central chamber. 2x South Passage, central chamber. | |
1 |
Outside Upper Level, center of the bridge. | |
| Armor | ||
1 |
Outside, north column, inside of it. | |
| Powerups | ||
1 |
Hall of Pillars, northwest side, inside of a pillar. | |
Walkthrough[]
PC (Demo)[]
"Despite worldwide protests, this historical landmark is now owned by Liandri. Jerl Liandri, President of Liandri Mining Corporation: "We owe it to the people to ensure quality cultural events. We won't settle for less.""
– Mission description
Winning this sole match nets you the Domination Championship.
PC (Retail/GOTY)[]
"Despite worldwide protests, this historical landmark is now owned by Liandri. Jerl Liandri, President of Liandri Mining Corporation: "We owe it to the people to ensure quality cultural events. We won't settle for less.""
– Mission description
Playstation 2[]
"Despite worldwide protests, this historical landmark is now owned by Liandri. Jerl Liandri, President Liandri Mining Corporation: 'We owe it to the people to ensure quality cultural events. We won't settle for less.'"
– Mission description
Winning this match nets you the Domination Championship.
Tips and tricks[]
- This map is well-suited for those who play defensively. Superior teamplay can secure the match tightly in your favor.
- The Shield Belt and Damage Amplifier can be obtained only with translocation.
- The two "Ankh" control points are easier to defend than the central Hall of Pillars, which can be attacked from all sides (including the top). Use the Keg o' Health walkway on the top of the map to quickly move from one Ankh to the other, and use the slats above each control point to rain down rockets upon their unsuspecting defenders. You can also use the side rooms next to the Ankh control points to ambush opponents who think they are taking an undefended point; health vials in these rooms will make your job even easier.
- Utilizing the rest of the map generally isn't worth it, as dropping down to get the Hall of Pillars means wasting valuable time walking back up the corridors to the main level of the map— that is, if you don't get killed in the process.
- Remaining on the middle floor lets you quickly run back and forth between the two ankh control points as well as check periodically on the hall of pillars point. The problem is that you won't find too many weapons placed conveniently around the center area of the middle level. You must venture down to the lower section or over the bridge at the top to secure some offensive and defensive weaponry.[1]
- Standing on the hall of pillars control point provides an excellent view of the lower level. Take a rocket launcher up there with you, and nothing on the ground floor can touch you. However, enemy players running around the second floor are sure to spot you through the hole and will delight endlessly at taking you out from the higher position. Don't hang around on top of the hall of pillars point for very long; use the translocator through the hole to reach the middle level and return to assaulting and defending the two ankh points.[1]
- Head into the ankh rooms and go either left or right until you reach the top floor. There are small slits in the wall near the exit that provide a window into the ankh room below. Hang out here and defend the ankh room from this relatively safe position. You can grab the health keg once it spawns, and there are plenty of weapons scattered around. If you lose the control point, simply return down the ramps and back into the ankh room.[1]
Trivia[]
- The map comes with the UT Demo alongside CTF-Coret, DM-Morpheus, DM-Phobos, DM-Tempest, DM-Turbine and the tutorials for Deathmatch, Domination and Capture the Flag.
- The name of the level, Sesmar, is Ramses spelled backwards.
- The retail version features Black Legion as the rival team.
- There's a hidden level entry text: "DOMINATE!!!!"
Location bugs[]
- The map has misnamed areas. The Blue Ankh area is named Red Ankh and viceversa. Also, both North and South passages are just named "Passages". OldUnreal's latch v469 fixes these errors, but for previous versions, these can be fixed by creating a file called "DOM-Sesmar.int" in the System folder with the following content:
[ZoneInfo1]
ZoneName="North Passage"

[ZoneInfo2]
ZoneName="South Passage"

[ZoneInfo3]
ZoneName="Outside"

[ZoneInfo4]
ZoneName="Red Ankh"

[ZoneInfo5]
ZoneName="Blue Ankh"
Gallery[]
")
Official screenshot.
")
")
External links and references[]
- ↑ 1.0 1.1 1.2 "Domination Map Strategies: DOM-Sesmar" @ PlanetUnreal
See also[]
| Domination maps for Unreal Tournament |
|---|
| Bonus Pack 4 maps: |
| Console maps: |