| Map stub |
|---|
| This article is a stub. You can help the Unreal Wiki by expanding it. What needs to be done: Add the missing info. |
Map description[]
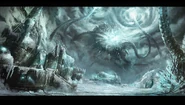
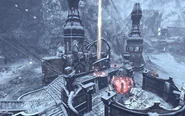
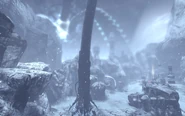
A map set in a snow mountain. Both bases are separated by a big, hollow mountain in the middle. At each side of the mountain, the Blue and Red bases and their respective Prime Nodes can be located, as well as an Avalanche per side which can be triggeres with a Shaped Charge near the Power Core area, which clears the own Prime Node and the East and West nodes once per game.
Inside of the mountain, there are three nodes, East, West and Center. Depending on the Link Setup, the unlinked nodes (see below) act as Support Countdown Nodes, and after 60 seconds, the enemy Prime Node is destroyed.
Link Setups[]
- [Regular]: Both Power Cores are connected to their respective Prime Nodes, and both Prime Nodes are connected to the Center Node. The East Node and West Node act as support nodes.
- Two Fronts: Both Power Cores are connected to their respective Prime Nodes, and both Prime Nodes are connected to the East Node and West Node. The Center Node acts as support node.
Weapons and pickups[]
Weapons[]
| Weapon | Count | Location |
|---|---|---|
W : 2 A : - |
Weapon: One along each Locker 2. Ammo: - | |
W : 8 A : 2 |
Weapon: One at each node, -sans Center node-, one along each Locker 2, and one along each turret. Ammo: along Sniper Rifle and Locker 2. | |
W : 16 A : - |
Weapon: [See below] Ammo: - |
Weapon Lockers[]
| Items | Count | Location |
|---|---|---|
| 12 | 2x Red Base. 2x Blue Base. 2x Red Prime Node. 2x Blue Prime Node. 1x East Node. 1x West Node. 2x Center Node. | |
| 4 | 1x Red Prime Node. 1x Blue Prime Node. 1x Red Base. 1x Blue Base. |
Pickups[]
| Pickup | Count | Location |
|---|---|---|
| Health | ||
14 |
4 at each base; 2 at each Prime Node; 2 at the Center Node | |
| Armor | ||
4 |
2 at each base | |
| Deployables | ||
2 |
1 at each base | |
| Key items | ||
3 |
1x Red Base. 1x Blue Base. 1x Center node. | |
(*) Rows marked in red are required for the "Like the back of my hand" achievement.
Vehicles[]
| Vehicle | Count | Location |
|---|---|---|
2 |
2x Red Base. | |
2 |
2x Blue Prime Node. | |
2 |
2x Red base. | |
1 |
1x West node | |
6 |
4x Blue base. 2x Blue Prime Node. | |
1 |
1x Blue Base. | |
2 |
2x Center Node. | |
1 |
1x Blue Base. | |
1 |
1x East node | |
4 |
1x Red Base. 1x Blue Base. 2x Center Node. |
Walkthrough[]
Act IV: Calculated Losses[]
Avalanche is one of, if not -the- hardest WAR map you'll play. The enemy fights very aggressively for control of their prime node and once they have it, they'll do the same for the middle node. If their offense has a weakness, it's that they underestimate the value of the support nodes, and this weakness can be used to cripple them. - But you have to do it swiftly and decisively.
- Othello: "Sweet! We're going snowboarding!"
- Jester: "And the snowbunnies are waiting for you at the lodge..."
- Reaper: "Yeah, the big BLUE lodge. We'll meet you there."
Chances are your allies will grab the orb. It doesn't really matter this time. They will take it to your prime node, and the enemy will do the same at theirs. Then the two will begin fighting over the center node, and since the enemy out guns you they will probably win. They may even push north with their orb and take your prime node. None of this really matters. What you have to do - and quickly - is take the manta out to the support nodes and claim them for your team. Both of them. You might face some resistance from another enemy who is trying the same thing. It's important that you defeat them, and secure both nodes.
Aside from giving your team access to a Goliath and a Dark Walker, this also damages the enemy prime node over time. Even if the enemy pushes all the way north in position to attack your core, the support nodes will destroy his prime node, and that will cascade back up north, releasing your prime node and the middle node as well. If you play your cards right, you can take the Goliath (or the Dark Walker) to the middle node and secure that one as well. If not, you have to hold the support nodes. This can be difficult, but once the enemy prime node falls, they will lose the center node and shift their focus back to their prime node, allowing you an opportunity to re-establish control of the support nodes.
Once you've got the support nodes and the center node, the enemy will struggle to get back on it's feet by shielding their prime node with the orb carrier while they rebuild and then push north into the center node. They will also send units west to take the tank node. Your allies will blindly charge into the enemy prime node to no avail. The constant attack does a reasonably good job of keeping them from taking the middle node, but the support nodes are the key to this map and they are both left undefended. This means your job is to fortify and maintain control of the support nodes. The east node can only be reached by passing the center node, and the bots usually get distracted or killed there. The west node, however, has an alternate entrance and a 'secret tunnel' which the enemy will send their orb carrier through. The latter is nothing special, just a crystal tunnel that loops back behind their prime node. The former, however, is our garrison.
The second tunnel to the west (Between the main tunnel and the crystal cave) has a clear shot at the enemy prime node. You can use the Goliath tank here to shoot down the tunnel and into the archway. This not only hits the prime node and damages it significantly, it also kills whoever was constructing it. You can easily get mega kills here, and this junction also allows you to head-off their orb carrier. Moreover, if they try to use the secret tunnel, you can rotate your turret and kill them with splash damage before they reach the western node. This effectively shuts down their construction efforts, but you have to make sure you stay back far enough that they don't destroy your tank.
At this point, one of three things can happen:
- Maintaining this choke-hold may give your allies enough footing to bring the orb and the dark walker down and secure the enemy prime node for your team. Once this is done you can move your tank down behind the prime node and shoot through the arch onto the hillside to continue shutting down their orb carrier. Your allies will be able to push into their core and possibly destroy it outright but even if they take back the prime node it will take them some time to reassemble their forces and launch an attack, and by this time you'll have a new tank.
- The enemy will use the 'avalanche' for which the level is named, to free the prime node and both support nodes. This can seriously damage your strategy depending on the timing. At best you can quickly recover control of the support nodes and resume with a slight hiccup, but at worst they can use this to seize control of one, or both support nodes and probably the center node as well. If this happens you should ignore the center node and focus completely on recovering the lost support nodes. Sure - you could fight over the center node and -maybe- push them backwards, but if the enemy takes just one more node - out of the two they have available to attack with their new vehicle - they can turn the tides on you very quickly. On the other hand, if the enemy pushes north and takes your prime node while you're securing the support nodes, their entire formation will collapse on itself again.
- The clock will steadily count down into Overtime. Because you own all but one of the nodes, your core will take only a little damage while the enemy who has no nodes at all will sustain much heavier damage. If you maintain the choke hold you will inevitably win. If you lose the choke hold, just try to hold onto each node as long as you can. The bots will get harder as their core ticks down, but they probably won't be able to reverse the situation before their core is destroyed.[1]
Tips and tricks[]
- The east and west nodes, when captured by the same team, cause a massive tentacle to latch on to the opposing team's Prime Node, slowly sapping its health away. If the other team is not paying attention, they could be forced back to their prime node, which can be devastating to their offense if they're currently at the enemy prime node and attacking your core.
- The Shaped Charge in this map can be used to destroy a barricade holding back a mountain of snow. When this happens an avalanche will occur (Hence the map name) and will wipe out the prime node, support nodes, and anyone in its path. Each base has one of these barricades, and they can only be used once per round each, so use them wisely. This objective only becomes available when the enemy team controls your prime node and your core is vulnerable. When this happens, the shaped charge spawns in your base. Keep in mind you cannot fire any other weapons while carrying the shaped charge. Even after the avalanche has been used, the shaped charge will spawn again if the enemy team captures the prime node again. While you cannot cause another avalanche, you can still use the Shaped Charge to great effect with careful placement- It can instantly destroy nodes, kill players in a small area, and even the powercore, if you should manage to be able to get close enough to it with one.
Trivia[]
- The map had the working name of ONS-JumpGate.
Gallery[]
External links and references[]
See also[]
| Warfare maps for Unreal Tournament 3 |
|---|
| Xbox 360 originals: |
| Titan Pack maps: |


